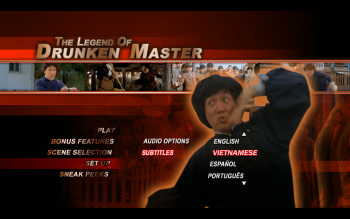
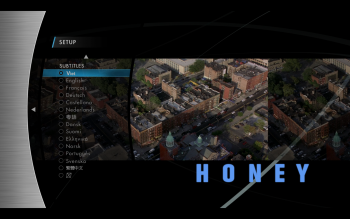
Guide for adding a subtitle on a Blu-Ray Disc keeping the original menu and its functions
Necessary software and codecs:
Codecs:
Before installing these codecs, uninstall all codecs that you may have installed on your computer.
ffdshow + haali
For Windows 7 users: Preferred Filter Tweaker for Windows 7 - it's free and straight forward
FOR HAALI: TAKE ONLY THE VERSION LISTED HERE.
Always take the latest version.
Software:
1. tsMuxer GUI - free
2. ArcSoft TotalMedia Theatre 3 Platinum or PowerDVD 9 - not free
3. BDInfo - free
4. Bluray.bat - free It's a file that will make the BD structure compatible for creating the .iso file, so the file can be played with PowerDVD.
5. ImgBurn - free
6. Clown BD - free ( Only for BD's with video split across multiple *.m2ts files )
7. BDEdit - free
Let's begin. DON'T SKIP ANY STEP. READ CAREFULLY AND DON'T RUSH IT.
Choose a partition with at least 100 GB free. Create a folder called "Workspace". In this folder, create other two folders, called "Original" and "Remuxed". In the folder called "Original" copy the original disc, the BDMV and CERTIFICATE folders. The "Remuxed" folder is for the results coming further below.
1. Open BDInfo and look for the folder containing the Bluray or, if it is a disc, the corresponding letter of the drive it's inserted in.
You can see which mpls in the PLAYLIST PLAYLIST contains the movie.
2. Open tsMuxer and press the ADD button, choosing that mpls file, in our case 00003.mpls.
Identify the subtitle you want to replace. Press the Remove button in order to delete it.
3. Add, again with the ADD button, the .srt file you have prepared on your hard drive.
With the UP button take it on to the 10th position, initially occupied by the subtitle deleted at the second step.
Select RON ( Romanian ) from the language menu. ( You can do it for your native language )
4. Now do the following settings:
GENERAL:
Blu-Ray:
Don't make any changes in the "Custom chapters list", as that information is taken directly from the mpls. At the "First MPLS file" choose 3, since we have 00003.mpls, the playlist containing the movie. If we had 00100.mpls containing the movie, we would have chosen 100. At "First M2TS file" choose 3, as well, following the same idea. Uncheck "Add blank playlist for cropped video" as it has no use. It's no problem should you forget it checked, it doesn't bother with anything.
Split & Cut:
Leave everything as it is.
Subtitles:
Press "Font" and choose the following settings: Press OK and you'll get the result in the screenshot above.
5. Select "Blu-ray disk" as Output and choose the folder where you want to have the remuxed version. That is X:\Workspace\Remuxed. X is the letter of the partition where you do the work.
6. Press "Start muxing" and wait. It should take a pretty long time, depending on your computer's preformance.
7. After tsMuxer finishes the work, stop it and open the "Remuxed" folder. Now, we will replace the files in the original folder with the modified ones. Before doing that, create a BACKUP folder, where you should save the files that you will replace in the Original folder. Go to the X:\Workspace\Remuxed\BDMV\STREAM folder and CUT the 00003.m2ts. Go to the X:\Workspace\Original\BDMV\STREAM folder and PASTE that file here. Press OK for replacing and wait for it to copy.
8. Go to X:\Workspace\Remuxed\BDMV\CLIPINF and CUT the 00003.clpi file. Go to X:\Workspace\Original\BDMV\CLIPINF and PASTE this file here. Press OK for replacement.
9. Open your "Original" folder in BDEdit. Go to PLAYLIST Tab and find the main movie mpls. After you find it, do the following:
If a Blu-Ray has 2 mpls for the main movie, do the same for both of them. For discs to work with TMT 5 you have to copy the IN_OUT Times and chapters from the mpls created with tsmuxer in the one you edit with BDEdit.
Additional information for the BDs with the movie split in several m2ts files: The same method applies for them as well. Write in tsMuxer the number of the playlist and, then, the number of the first m2ts contained. For these discs you will have to skip step 9 and copy the remuxed mpls in your "Original" folder. Go to X:\Workspace\Remuxed\BDMV\PLAYLIST and CUT the 00003.mpls file ( example ). Go to X:\Workspace\Original\BDMV\PLAYLIST and PASTE this file here. Press OK for replacement.
10. After finishing steps 1-9, copy the file bluray.bat in the folder "Original", next to BDMV and CERTIFICATE. Play it and wait to finish. After it's done its work (complete the disc files in order to have a proper iso file) delete it from the "Original" folder.
11. Open ArcSoft TotalMedia Theatre 3 Platinum and drag and drop the "Original" folder. TMT reads from folder, PowerDVD 9 does not, that is why you must use TMT in order to ensure that everything is functional: the menu, the chapters, the subtitle.
12. After you make sure everything is all right, open ImgBurn and follow these steps:
12a) Choose to make ISO from files and folders.
12b) From the folder "Original", drag and drop the BDMV and CERTIFICATE folders and make the following settings in ImgBurn:
After the iso file is done, load it in Daemon Tools or in the Virtual Drive you prefer and test it once again with TMT and PowerDVD 9. Someone told me it also runs perfectly on PowerDVD 8. But keep the software up to date.
ATTENTION:
1. Some discs have 2 video tracks. Like this: One 1080p, which is the movie, and one 480p, which is a bonus, or part of an extra. Should this be the case, to succesfully insert the subtitle and for the movie to run, with the UP button, move the video track from the second position to the first position and it will run correctly. DO NOT DELETE THE 480p TRACK, ONLY MOVE IT ON THE SECOND POSITION.
2. Some discs have the video split across multiple *.m2ts files. This discs are containing the Rated and Unrated version, or some extra titles. When you come across one of them, DO NOT USE tsMuxer directly, because tsMuxer does not handle well seamless branched discs. First demux the streams with CLOWN BD ( it's a pretty intuitive program ) and then feed them into tsMuxer. You'll find the demuxed streams in "eac3to output" folder. For chapters, copy the text from chapters.txt that results after demuxing with CLOWN BD, only the time values. Like this: The rest remains exactly the same. Be sure to insert the streams in the correct order.
3. Sometimes, with discs that are having the video split across multiple *.m2ts, you will find out that some of your streams are duplicated after the remux. This is not a problem. Feed the *.mpls from the "Remuxed" folder in tsMuxer, remove the duplicated entries and start muxing again. The same settings as before apply here too. Just don't set the "Subtitles" tab again. It's redundant, as now the subtitles are already in the stream.
4. It's a problem on certain blu-ray discs. tsMuxer isn't reading correctly the playlist and the chapters get screwed up, as well as the end time of the movie. The fix for this is to open the original BD in BDEdit, go to Playlist TAB, choose the movie playlist and then click save chapters. This will save a list of chapters, the correct list and you paste it in tsmuxer, in Custom Chapters List.
ADDING SUBTITLE TO A SERIES BLU-RAY KEEPING THE ORIGINAL MENU
After prolonged tests, I've developed a method for series discs too.
Let's say that we have a series blu-ray disc with 3 episodes.
1. In the "Remuxed" folder we will make 3 new folders, "Episode 1", "Episode 2", "Episode 3".
2. We follow the 1-6 steps from the tutorial above. We will do these operations for all 3 episodes. In most cases, the structure is this: 1 big mpls that contains all 3 episodes and 1 or two mpls files for each individual episode. WE WILL NOT INSERT THE BIG MPLS IN TSMUXER. NEVER ! You will see with BDInfo which playlists are containig the individual episodes.
3. After tsMuxer finishes and we have all 3 episodes edited in our "Remuxed" folder, we will replace the m2ts + clpi files from the "Original" folder with the ones from "Episode 1", "Episode 2", "Episode 3" folders.
4. Open your "Original" folder in BDEdit and edit the IN time for the individual episodes playlist + the big mpls that contains all episodes. You can see these playlists number in BDInfo:
Edit the IN time as in the picture below for all of them ( individual episodes playlists and the big mpls containing all episodes )
Some discs will have in the big mpls some extra credits, like this:
They are depicted with blue. For those DO NOT edit the IN time. Edit the IN time only for the episodes.
The same method applies for discs containing both Theatrical and Extended versions. The same steps, only that you'll repeat them for 20+ m2ts files.
Enjoy and I'll wait for feedback from you. Should something not succeed from your first attempt, don't give up. The guide will be completed as new editing methods appear. In some cases, not all the extras can be kept. This method was made by me, after testing several BDs, with various structures. If you have something useful to add, feel free to do so. There are many variables to a blu-ray disc. Recently I've had one where I had to modify a *.xml file in order to run the movie to the end and select the correct playlist for all the regions. There are so many variables, that any input from you is extremely useful. Thank you very much.
--------------------------------------------------------------------------------
Last edited by crl2007; 11th January 2011 at 20:04.


